
To set up Print Preferences, you have to:
1) Click on “Archive”
2) Select “Preferences“.

PRINT PRESETS:
Print presets allow to create various print options and to switch them at will.
Print presets, are set along with “View” and “Preview” presets, and are locally stored on the user's system. At the top of the panel is located a dropdown list showing the available presets. The preset in use has an asterisk (*) next to its name.

It is possible to CREATE new presets by clicking on “Add” and DELETE one of them by clicking on “Delete”.

The preset in use can’t be deleted; to delete the preset in use you have to chose a temporary preset so that the one you want to delete is no longer the one in use.
The three buttons you find at the bottom of the panel allow the user to Close the panel, to Save changes and to Apply the preset.
You can find the new configuration in PLAN_PRESET folder
|

The Print presets panel is divided in various tabs: View, Editorial, Advertising, Elements, and Pages.
VIEW TAB:
| Function | Description |
|---|---|
| Pages per line | Number of pages per each line. The default number is 16, but it can be as low as 1 and as high as needed |
| Zoom | The default level is 100% but it can be set as high as 5000% and as low as 25% |
| Page | Selecting this option the print size will be adapted to page size |
| Page width | Selecting this option the print size will be adapted to page width |
| Page height | Selecting this option the print size will be adapted to page height |
| Advertising previews | This option enables you to show/hide advertising previews. By default, it is enabled |
| Editorial previews | This option enables you to show/hide editorial previews. By default, it is enabled |
| Advertising format | This option enables you to chose the advertising format |
| Show grid | This option shows/hides grid lines on the Plan. By default, it is enabled |
| Insert icons | This option shows/hides the Insert icons on the Plan. By default, it is enabled |
| Show headers | This option shows/hides the header panel on top of the Plan. By default, it is enabled |
| Ad info on page | This option allows to focus on Editorials (Editorial View) or Adverts (Advertising View). By default, it is set up Editorial View |

EDITORIAL TAB (FONT):
| Function | Description |
|---|---|
| Show editorial info on page | This option shows/hides editorial info on the Plan |
| Transparent | |
| Font type | This option allows to select a Font Type for the text displayed |
| Font size | This option allows to select a Font Size for the text displayed |

ADVERTISING TAB:
| Function | Description |
|---|---|
| Font | |
| Font type | This option allows to select a Font Type for the text displayed |
| Font size | This option allows to select a Font Size for the text displayed |
| Ad status: this option allows to choose how to display the ad status | |
| Do not show Ad status | The Ad status is not shown |
| Show Ad status as icon | The Ad status is shown as an icon inside the advert |
| Color the entire Ad format | The Ad status is shown by coloring the entire ad format |
| Ad info on page | |
Show quantity | |
Show data | |
Show absolute spec. pos. alarms | |
| Show Empty Fields | |

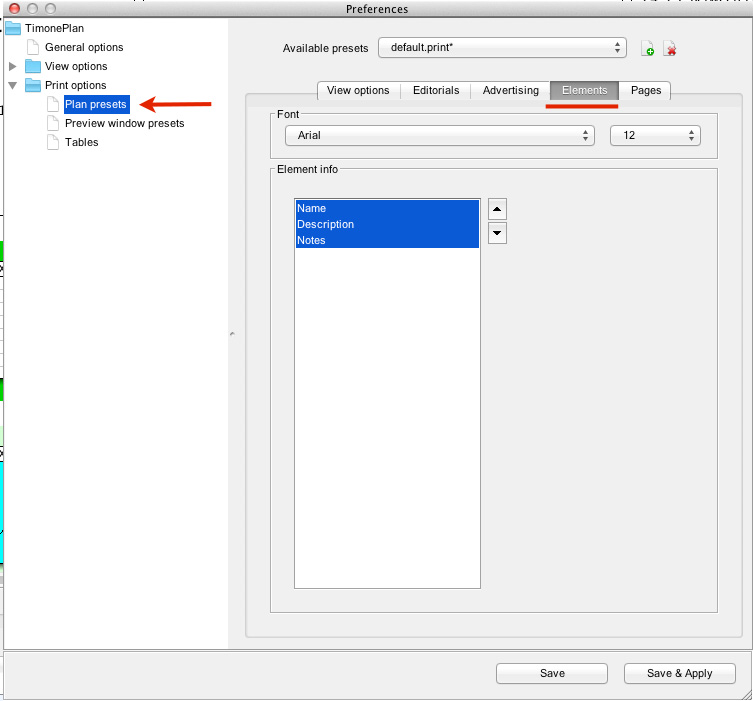
ELEMENT TAB:
| Function | Description |
|---|---|
| Font | |
| Font type | This option allows to select a Font Type for the text displayed |
| Font size | This option allows to select a Font Size for the text displayed |
| Element info: This option allows to choose which info to show. | |
| Name | Name of the element |
| Description | Brief description of the element |
| Notes | Notes about the element |
PAGES TAB:
| Function | Description |
|---|---|
| Page number font | |
| Font type | This option allows to select a Font Type for the text displayed |
| Font size | This option allows to select a Font Size for the text displayed |
| Folio number font | |
| Folio Numbering | You can choose if you want to show the Folio Number |
| Font type | This option allows to select a Font Type for the text displayed |
| Font size | This option allows to select a Font Size for the text displayed |
| Section Font | |
| Section name | You can choose if you want to show the Section Name |
| Font type | This option allows to select a Font Type for the text displayed |
| Font size | This option allows to select a Font Size for the text displayed |
| Grid font | |
| Grid code | You can choose if you want to show the Grid Code |
| Font type | This option allows to select a Font Type for the text displayed |
| Font size | This option allows to select a Font Size for the text displayed |
| Page info font | |
| Page info | This option allows to enable the view of the editorial name placed on the pages |
| Font type | This option allows to select a Font Type for the text displayed |
| Font size | This option allows to select a Font Size for the text displayed |
| Groups of printer sections (signatures) font | |
| Section name | You can choose if you want to show the Section Name |
| Font type | This option allows to select a Font Type for the text displayed |
| Font size | This option allows to select a Font Size for the text displayed |

PREVIEW PRESETS:
If you want to see a preview preset of your document, you have to use the “Preview” menu, which is along with the “View” one and which is stored locally on the user's system.
At the top of the panel is located a dropdown list showing all the available presets. The preset in use has an asterisk (*) next to its name.

It is possible to CREATE new presets by clicking on “Add”, but also DELETE one of them by clicking on “Delete”.

The preset in use cannot be deleted; to delete the preset in use, you have to chose a temporary one in order to delete it, so that it is no longer the one in use.
The two buttons you find at the bottom of the panel allow the user to Save changes and to Apply the preset.
It is possible to define the following elements:
| Function | Description |
|---|---|
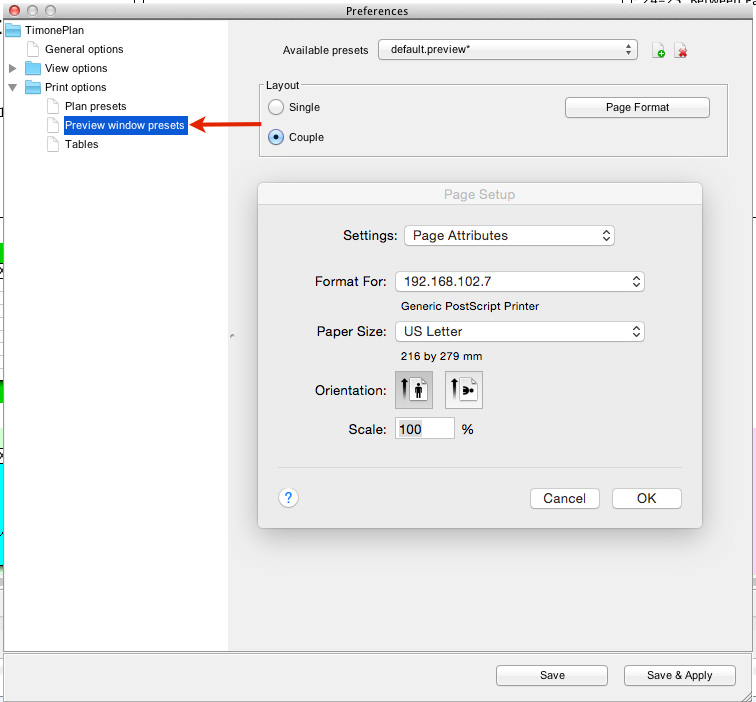
| Layout: this option allows to set the print layout of the preset | |
| Single | Thanks to this option, the user can see only a single page in the preview |
| Couple | Thanks to this option, the user can see a couple of pages |
| Page format: this button allows to configure the page settings for printing. | |
| Format for | This option allows to select the most suitable page format for the printer in use |
| Paper size | This option allows to select the size of the paper sheet |
| Orientation | This option allows to select the orientation of the text on the paper sheet |
| Scale | This option allows to set the scale of the text on the paper sheet |
TABLES:
This menu allows to configure page settings for printing. It is possible to set the following elements:
| Function | Description |
|---|---|
| Format for | This option allows to select the most suitable page format for the printer in use |
| Paper size | This option allows to select the size of the paper sheet |
| Orientation | This option allows to select the orientation of the text on the paper sheet |
| Scale | This option allows to set the scale of the text on the paper sheet |


